Outlook 에서 보낸 사람 이름을(를) 기준으로 이메일을 자동으로 필터링하고 차단하는 방법은 무엇인가요?
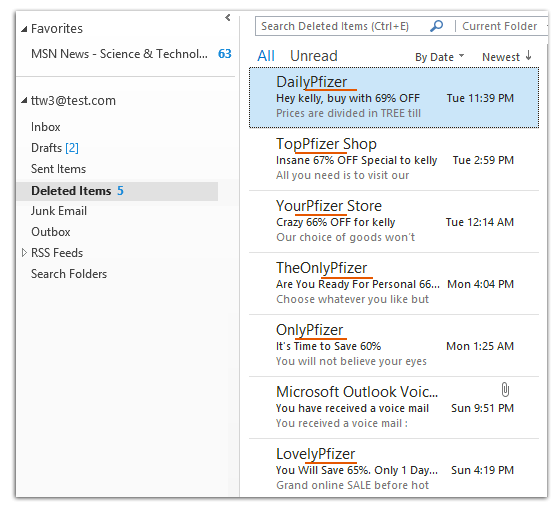
최근 다양한 보낸 사람의 이메일 도메인별로 필터링에서 발송된 광고 이메일이 대량으로 쏟아졌고, 제목과 내용은 다르지만 모든 이메일의 보낸 사람 표시 이름에 공통된 키워드가 포함되어 있다는 점을 발견하셨을 것입니다(아래 스크린샷 참조). 이러한 광고 이메일을 Outlook 의 기본 스팸 메일 기능으로 필터링하고 차단하는 것은 어려울 수 있습니다. 다행히 Microsoft Outlook 에서는 보낸 사람의 표시 이름을 기준으로 이러한 이메일을 효과적으로 필터링하고 차단할 수 있는 간편한 방법이 있습니다。
Outlook 의 규칙 기능을 사용하여 보낸 사람 이름을(를) 기준으로 이메일 자동 차단
Kutools 의 스팸 기능을 사용하여 보낸 사람 이름을(를) 기준으로 이메일 자동 차단
Outlook 의 규칙 기능을 사용하여 보낸 사람 이름을(를) 기준으로 이메일 자동 차단
Outlook 의 기본 제공 스팸 메일 차단은 특정 보낸 사람의 이메일을 차단할 수 있지만 옵션이 다소 제한적입니다。
단계 1: 메일 보기로 전환한 후 규칙 및 알림 대화 상자를 엽니다。
- Outlook 2007 에서는도구>규칙 및 알림을(를) 클릭하세요。
- Outlook 2010 및 2013 에서는규칙>규칙 및 알림 관리자를홈탭에서 클릭하세요。

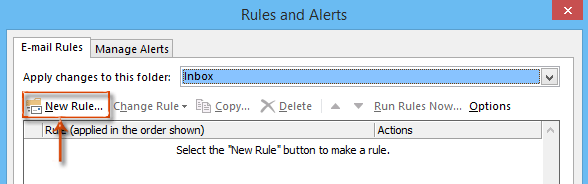
단계 2: 규칙 및 알림 대화 상자에서새 규칙버튼을 클릭하세요。
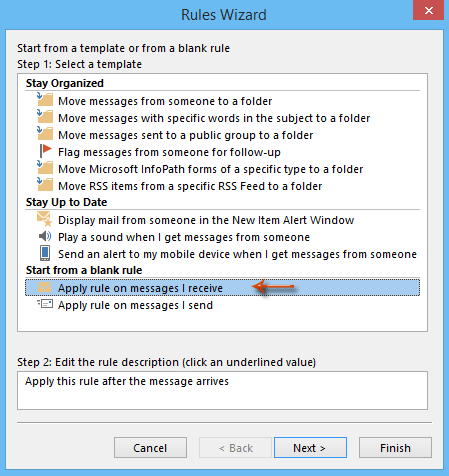
단계 3: 이제 규칙 마법사 대화 상자로 이동합니다。받은 메시지에 규칙 적용(또는 Outlook 2007 에서 메시지 수신 시 확인)을 강조 표시한 후다음버튼을 클릭하세요。
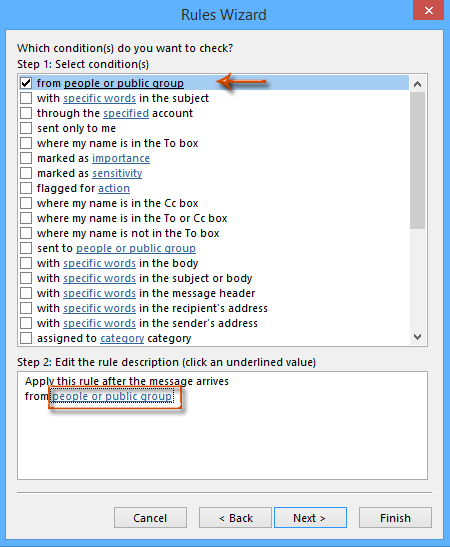
단계 4: 두 번째 규칙 마법사 대화 상자에서사용자 또는 공용 그룹에서를 선택한 후사용자 또는 공용 그룹텍스트를 클릭하세요。 스크린샷 참조:
단계 5: 그러면 규칙 주소 대화 상자가 나타납니다。 필터링 및 차단하려는 보낸 사람의 표시 이름을보낸 사람상자에 입력하고확인버튼을 클릭하세요。
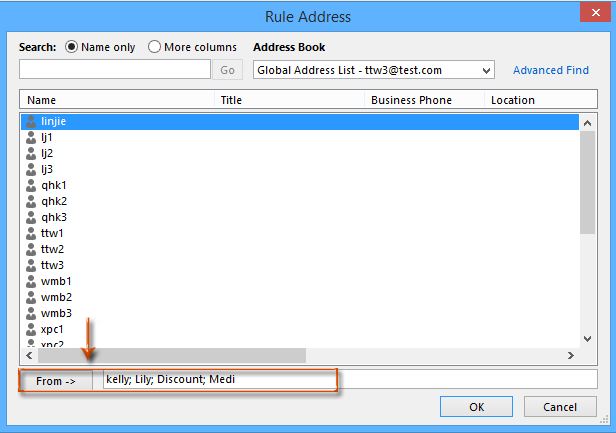
참고:
- 보낸 사람의 전체 표시 이름을 입력하거나 그 중 특정 키워드만 입력할 수 있습니다。
- 여러 보낸 사람의 표시 이름은 세미콜론(;)으로 구분하세요。
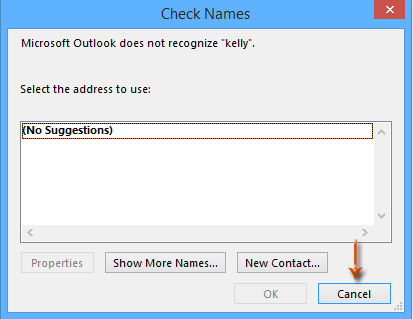
단계 6: 이름 확인 대화 상자가 나타나면취소버튼을 클릭하세요。
단계 7: 이제 규칙 마법사 대화 상자로 돌아가서다음버튼을 클릭하세요。
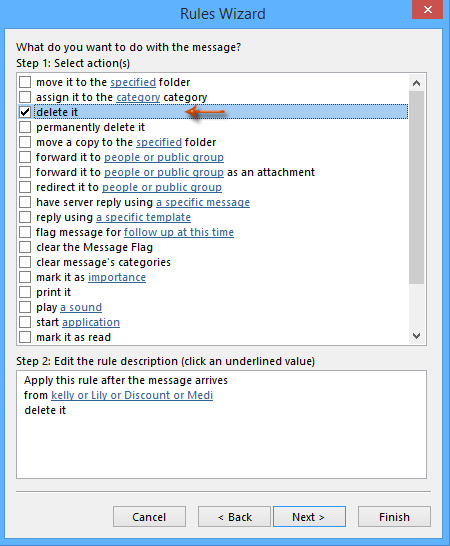
단계 8: 세 번째 규칙 마법사 대화 상자에서삭제하기를 선택하고다음버튼을 클릭하세요。
단계 9: 네 번째 규칙 마법사 대화 상자에서다음버튼을 클릭하세요。
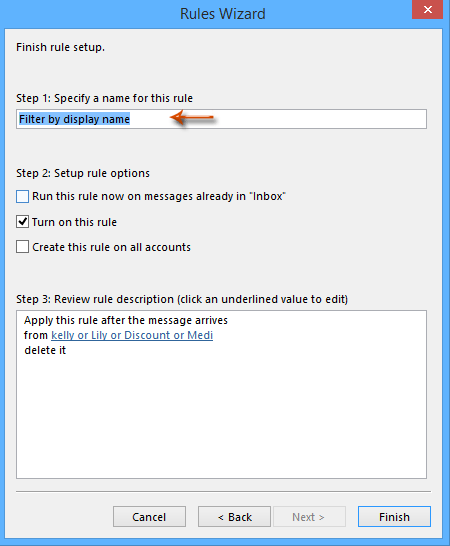
단계 10: 이제 다섯 번째 규칙 마법사 대화 상자로 이동합니다。 아래 상자에 새 규칙의 이름을 입력하세요。단계 1: 이 규칙의 이름 지정그런 다음마침버튼을 클릭하세요。
단계 11. 그러면규칙 및 알림대화 상자로 돌아갑니다。 전체 설정을 완료하려면확인버튼을 클릭하세요。
참고:「수신함」에 이미 있는 메시지에 지금 이 규칙 실행옵션을 선택하는 것은 선택 사항입니다. 이 옵션을 선택하면 단계 5 에서 지정한 조건을 충족하는 보낸 사람 표시 이름을 가진 기존 이메일이 모두 필터링되어 삭제됩니다。
Kutools 의 스팸 기능을 사용하여 보낸 사람 이름을(를) 기준으로 이메일 자동 차단
Kutools for Outlook은(는) 더 강력한 솔루션을 제공하며,스팸기능을 통해 고급 조건 조합을 기반으로 이메일을 자동으로 필터링하고 차단할 수 있습니다。 예를 들어, 보낸 사람 이름에 두 개의 특정 문자열이 동시에 포함된 경우 이메일을 차단하는 규칙을 생성할 수 있습니다。
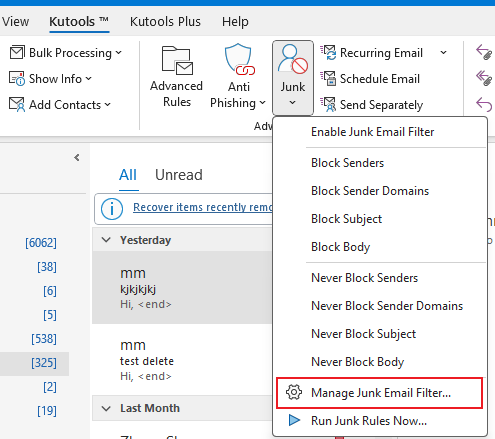
단계 1. Kutools for Outlook 을(를) 다운로드하여 설치하고 Outlook 을 연 후Kutools>스팸>스팸 메일 관리을(를) 클릭하세요。
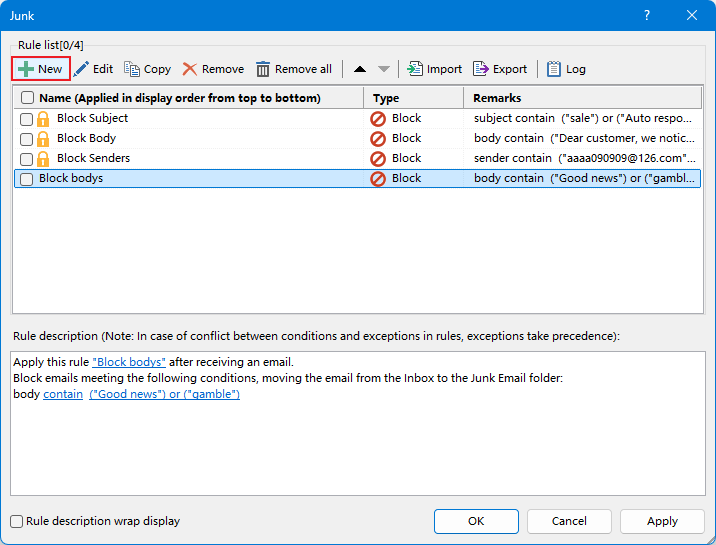
단계 2。새로 만들기버튼을 클릭하여스팸대화 상자에서 새 규칙을 생성하세요。
단계 3。새 규칙 대화 상자의 1 단계에서
「보낸 사람에 특정 단어 포함됨」 확인: 이 조건의 확인란을 선택하여 보낸 사람 이름을(를) 기준으로 이메일을 필터링하세요。
텍스트 포함 대화 상자 열기: 텍스트 포함 대화 상자에서새로 만들기버튼을 클릭하세요。
텍스트 추가 문자열: 텍스트 문자열(예: 「mm」)을검색 텍스트대화 상자의 빈 상자에 입력하세요。 이를추가검색 목록에 포함하려면 클릭하세요。
- 「mm」 또는 다른 문자열을 포함하는 이메일을 차단하려면새로 만들기를 클릭하고 각 문자열을 개별적으로 추가하세요。 이러한 문자열 간의 관계는 “또는“입니다。
- 보낸 사람 이름에 「mm」과(와) 다른 문자열이 모두 포함된 이메일을 차단하려면 두 문자열을 동시에검색 목록검색 텍스트대화 상자에 추가하세요。
설정 저장: 텍스트 추가를 확인하고 완료하려면확인>확인을(를) 클릭하세요。


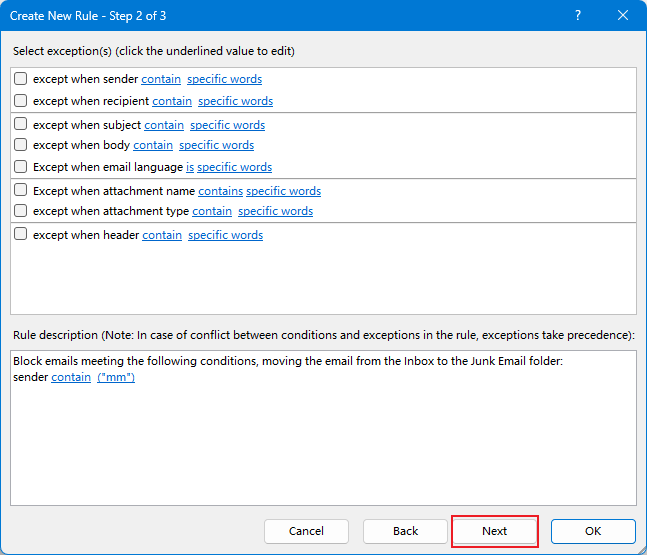
단계 4。다음을(를) 클릭하여새 규칙 대화 상자의 2 단계로 진행하세요。 여기서 규칙에 대한예외를 선택할 수 있습니다。 예외가 필요하지 않으면 단순히다음을(를) 클릭하여 계속 진행하세요。 to continue.
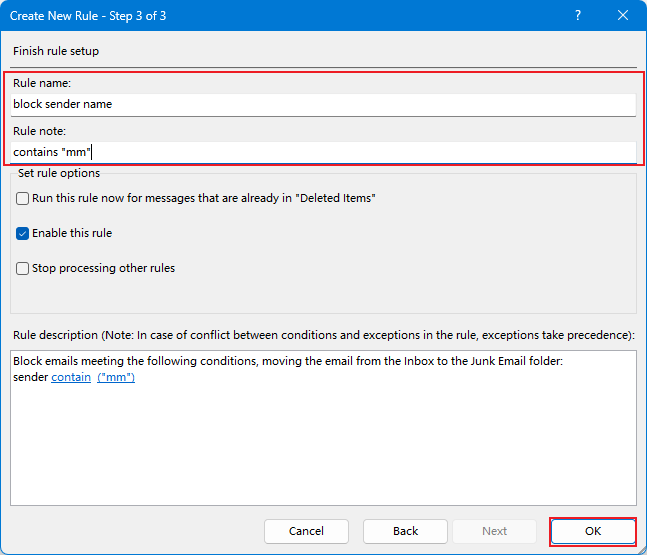
단계 5. 마지막 단계에서 규칙 이름과(와) 메모를 입력하고확인>확인을(를) 클릭하세요。
단계 6. Kutools for Outlook 에서예를 클릭하여활성화스팸 기능을 사용하세요。
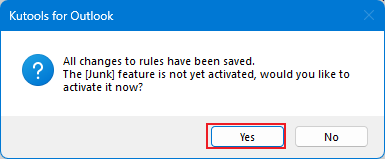
이제부터 보낸 사람 이름에 「mm」이(가) 포함된 모든 이메일은 차단되어 삭제된 항목 폴더로 이동됩니다。
최고의 Office 생산성 도구
Kutools for Outlook 의 완전히 새로운 버전을 100+가지 놀라운 기능과 함께 경험해 보세요!지금 다운로드하세요!
🤖KUTOOLS AI:고급 AI 기술을 활용하여 이메일 회신, 요약, 최적화, 확장, 번역, 작성 등 이메일 관련 작업을 손쉽게 처리합니다。
📧이메일 자동화:자동 회신(POP 및 IMAP 지원)/이메일 예약 발송/이메일 발송 시 규칙에 따라 자동 참조/숨은 참조/자동 전달(고급 규칙)/자동 인사말 추가/수신자 여러 명이 포함된 이메일을 자동으로 개별 메시지로 분할...
📨이메일 관리:이메일 회수/제목 등을 기준으로 피싱 이메일 차단/중복된 이메일 삭제/고급 검색/폴더 정리...
📁첨부파일 프로:일괄 저장/일괄 분리/일괄 압축/자동 저장/자동 분리/자동 압축...
🌟인터페이스 마법:😊더 예쁘고 멋진 이모지 제공/중요 이메일 수신 시 알림/Outlook 종료 대신 최소화...
👍한 번의 클릭으로 해결:모두 회신(첨부 파일 포함)/피싱 이메일 방지/🕘발신자의 현재 시간 시간대 표시...
👩🏼🤝👩🏻연락처 및 캘린더:선택한 이메일에서 연락처 추가 일괄 생성/연락처 그룹를 개별 그룹으로 분할/생일 알림 제거...
Kutools 를 선호하는 언어로 사용하세요 – 영어, 스페인어, 독일어, 프랑스어, 중국어 및 40+개의 다른 언어를 지원합니다!
한 번의 클릭으로 즉시 Kutools for Outlook 의 잠금을 해제하세요。 더 이상 기다리지 마시고 지금 다운로드하여 업무 효율을 높이세요!


🚀 한 번의 클릭으로 다운로드 — 모든 Office 애드인 받기
강력히 권장: Kutools for Office (5-in-1)
한 번의 클릭으로다섯 개의 설치 프로그램을동시에 다운로드하세요 —Kutools for Excel, Outlook, Word, PowerPoint및Office Tab Pro.지금 다운로드하세요!
- ✅한 번의 클릭으로 편리하게: 다섯 개의 설치 패키지를 한 번에 다운로드하세요。
- 🚀모든 Office 작업에 대비 완료: 필요한 시점에 필요한 애드인을 설치하세요。
- 🧰포함됨: Kutools for Excel / Kutools for Outlook / Kutools for Word / Office Tab Pro / Kutools for PowerPoint